Monitoring the water quality in your pond is essential for maintaining a healthy aquatic environment. As a DIY enthusiast or home pond owner, you can take control of this responsibility by creating your own water testing kit. This guide will provide you with the knowledge and step-by-step instructions to assemble an effective DIY water testing kit that yields lab-grade accuracy. We will explore essential materials, testing methods, and tips for successful testing and sample collection. Let’s delve into the importance of water quality and how you can manage it effectively at home.
Why Water Quality Matters
Keeping your pond’s water quality in check is crucial for the health of the pond and its inhabitants. The well-being of aquatic life depends significantly on the water’s chemical composition. Key indicators such as pH levels, chlorine content, and water hardness greatly influence the ecosystem’s balance.
Understanding these factors is the first step toward a thriving pond. For example, maintaining pH levels within the ideal range of 6.5 to 8.5 is vital for the fish and aquatic plants living in your pond. Additionally, monitoring chlorine levels helps prevent harm, as high concentrations can be toxic. Water hardness can also affect the overall well-being of the species residing within your pond. Regular testing enables you to address potential issues promptly, ensuring a healthy habitat.
Thanks to advancements in technology, you can now employ DIY testing methods that provide reliable insights into water quality. Instead of relying solely on expensive laboratory tests, basic materials and methodologies allow you to perform accurate tests in the comfort of your home. This puts you in the driver’s seat as a pond owner, enabling you to actively monitor and manage your aquatic environment. Furthermore, utilizing open-source hardware can enhance the accuracy of your testing at minimal cost.
In summary, understanding and managing your pond’s water quality is essential for creating a balanced aquatic ecosystem. DIY water testing methods empower you to gain valuable insights, thus improving both the health of your pond and your enjoyment of it.
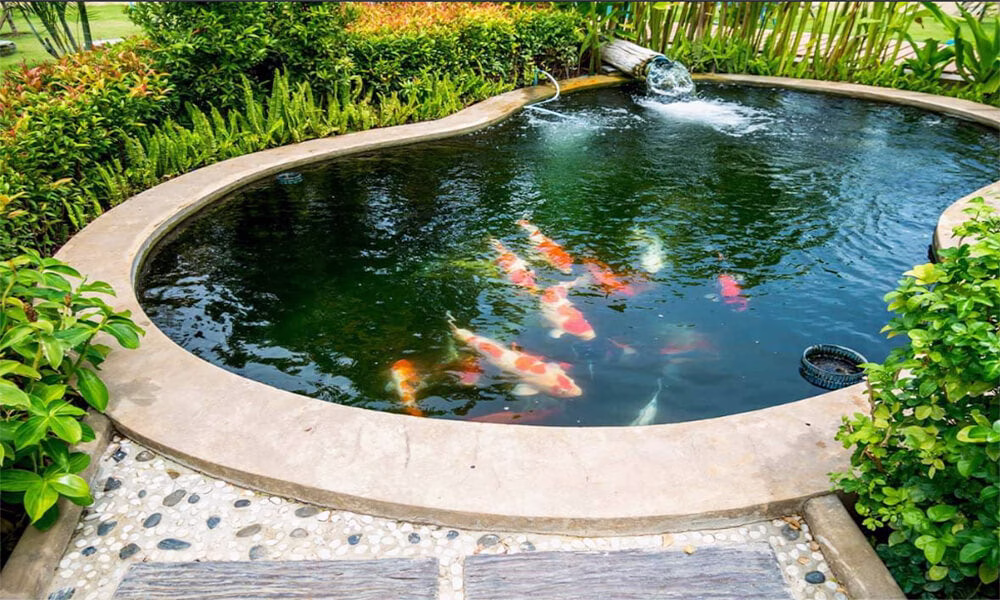
Vibrant pond ecosystem clarity indicates good water quality (Source: Living Water Aeration)
Essential Tools for Your DIY Water Testing Kit
To assemble your DIY water testing kit, you need to gather specific tools and materials. Creating a kit that meets lab-grade accuracy standards requires careful selection of components.
Materials You Will Need
-
pH Test Kits: Choose between pH indicators, like phenol red solutions, or opt for digital pH meters for precise readings. Digital meters may require calibration solutions.
-
Chlorine Testing Kits: The DPD (N,N-diethyl-p-phenylenediamine) method is regarded as the standard for accurate chlorine measurement. Look for budget-friendly options that meet your needs.
-
Hardness Testing Kits: A simple soap-based kit can provide quick estimates of water hardness, while more precise options utilize reagents like EDTA.
-
Sample Collection Containers: Use only sterile bottles specifically designed for water testing to avoid contamination.
-
Calibration Solutions: Make sure you have the proper solutions for calibrating any digital pH meters.
-
Safety Gear: Don’t forget gloves and protective eyewear, which are crucial when working with chemicals.
Cost-Effective Options
To keep costs low, consider using open-source hardware solutions. Many DIY enthusiasts have successfully constructed pH meters and other sensors using affordable components. Numerous online resources provide detailed instructions for creating these tools, enabling you to save money while enhancing accuracy.
In conclusion, gathering the right materials is critical for creating an effective water testing kit. Your investment in quality equipment will yield the most reliable results when monitoring your pond’s health.
Essential materials for DIY water testing kits (Source: Consumer Notice)
Step-by-Step Guide to Assembling Your Water Testing Kit
After you have collected your materials, it’s time to assemble your water testing kit. Follow these steps to ensure that your kit is user-friendly and accurate.
-
Prepare Your Testing Area: Make sure your workspace is clean and organized. Lay out all your materials for easy access.
-
Assemble pH Testing Tools:
- If you’re using a digital pH meter, calibrate it according to the manufacturer’s instructions using the calibration solutions. This usually involves placing the sensor in low and high pH solutions to align the meter.
- If you’re using colorimetric methods, follow the preparation instructions for the phenol red solutions.
-
Setup Chlorine Testing:
- Organize your chlorine testing reagents. Carefully read the product instructions for using the DPD method, ensuring you mix and match colors correctly to determine levels.
-
Prepare for Hardness Testing:
- Collect your soap-based medium or other necessary reagents, and adjust according to the kit’s directions.
-
Finalize Assembly:
- Store all items in a suitable container, clearly labeling each compartment for easy identification. Ensure the necessary safety equipment, like gloves and eyewear, is included.
-
Smartphone Compatibility:
- Consider utilizing apps that can assist in recording and tracking your test results. Some apps can even interpret color changes from test strips and store historical data.
By following these steps, you will have successfully assembled a comprehensive water testing kit that will help you effectively monitor the health of your pond.
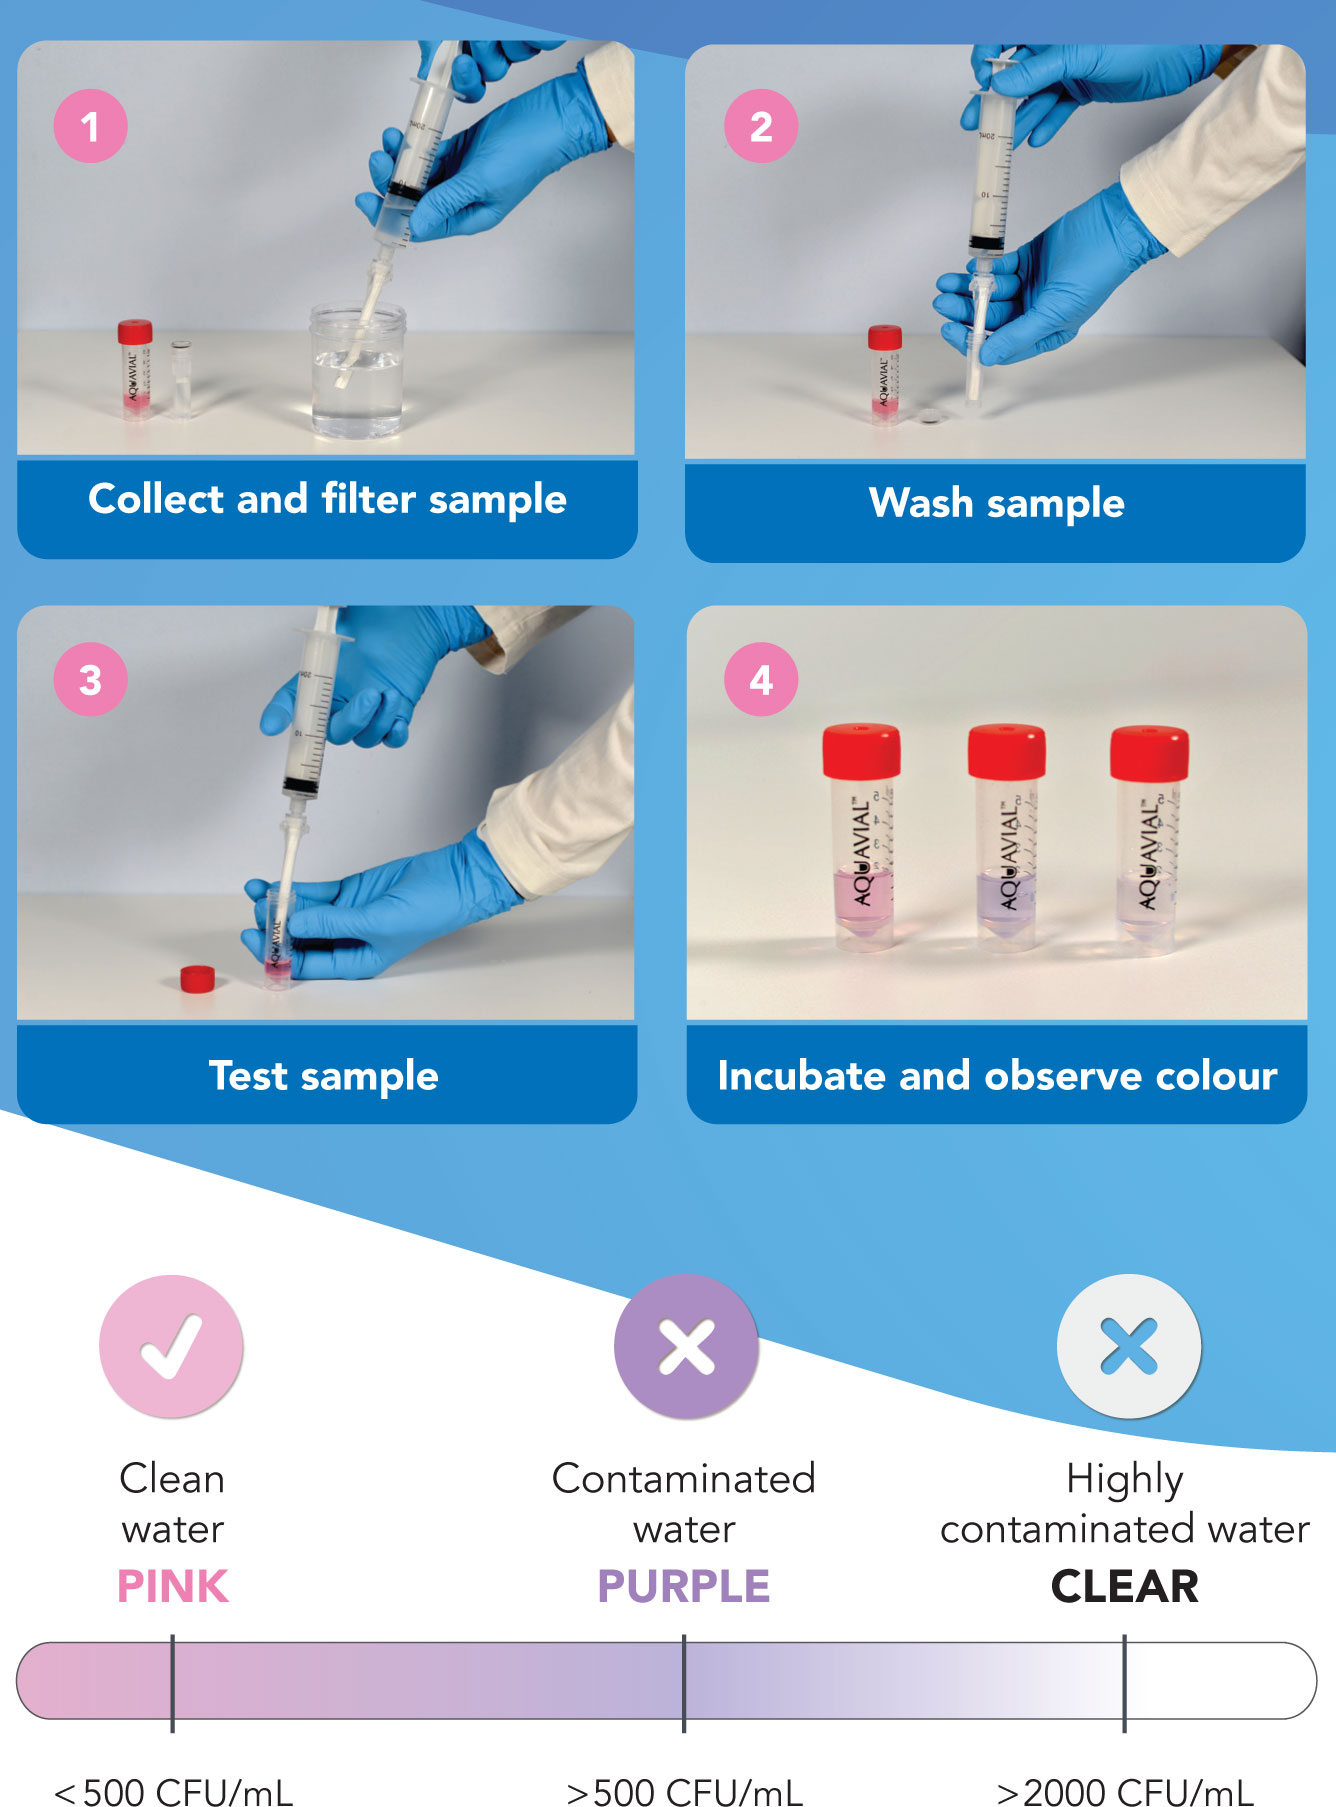
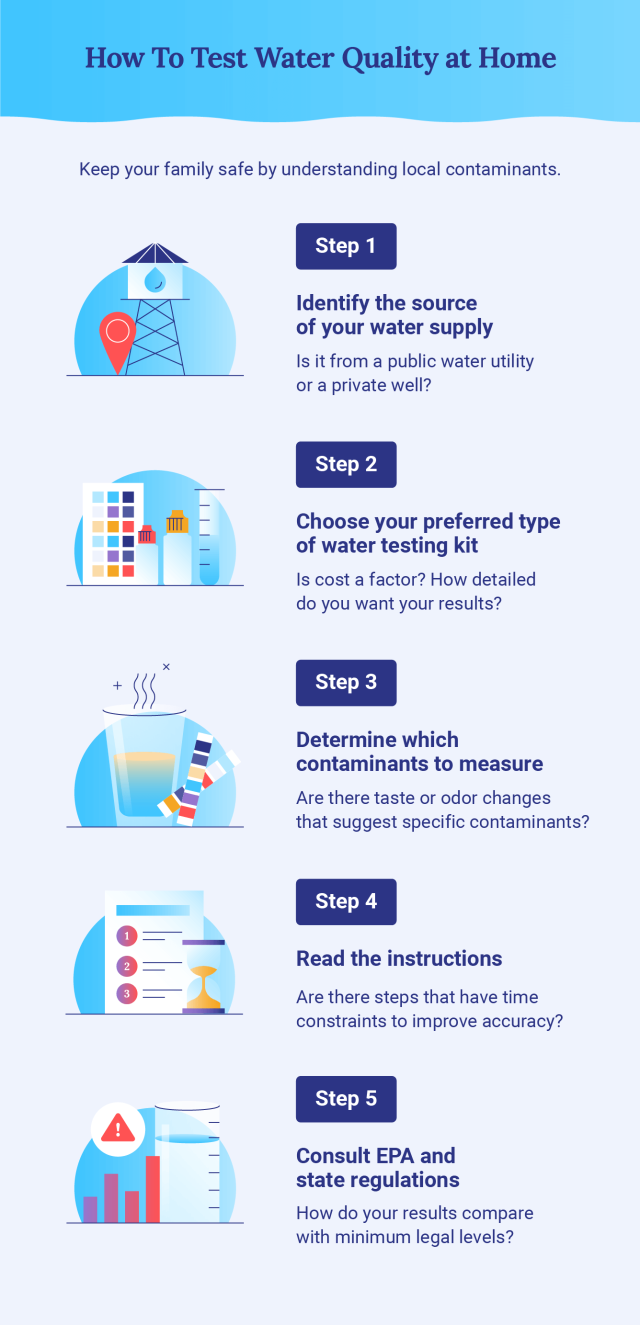
Illustration of assembling a water testing kit (Source: Newline Medical)
Best Practices for Collecting and Analyzing Samples
Correctly collecting water samples is just as critical as performing the tests. The integrity of your samples directly impacts the results. Here are some best practices to help you avoid common pitfalls.
Sample Collection Techniques
-
First Draw Method: For specific tests, collect your first draw sample in the morning before water has been used. This captures water that has been stagnant, making it ideal for testing lead or copper concentrations.
-
Fully Flushed Method: For accurate assessments of source water quality, run the cold water tap for 5 to 10 minutes prior to sample collection. This will help ensure you’re not sampling water that has been sitting in the pipes.
-
Use Proper Containers: Always utilize sterile bottles intended specifically for water testing. For bacterial testing, make sure you have a pre-preserved sealed bottle.
Maintaining Sample Integrity
- Store samples thoroughly and ideally refrigerate them immediately after collection.
- For accurate results, aim to test samples or send them to labs within the recommended time frame, which is typically within 30 hours for bacterial tests.
By adhering to these best practices, you can ensure that your water samples remain intact for accurate analysis.
Illustration of proper water sampling techniques (Source: Purdue Extension)
Comparing DIY Kits to Professional Testing
Understanding the differences between DIY methods and professional laboratory testing can help you make informed decisions regarding water testing for your pond.
Pros and Cons of DIY Water Testing
A DIY water testing kit offers the convenience of monitoring your pond at home, at your convenience. You can generally expect more flexibility and lower costs in comparison to sending samples to a lab. However, the potential for inaccuracies can exist.
DIY Testing Accuracy
While professional tests often provide the highest level of reliability, many chemical test kits designed for home use yield surprisingly accurate results, particularly when utilizing established methods like colorimetric pH testing or the DPD method for chlorine measurement.
The key to effective DIY testing is consistency—ensure that you follow proper sample collection and testing procedures to improve the reliability of your results.
Engaging in DIY water testing allows you to monitor critical pond parameters frequently. However, for comprehensive assessments and broader testing, periodic professional testing may be advisable.

Comparison of DIY and professional water testing methods (Source: The Safe Healthy Home)
Overcoming Challenges: Common Pitfalls and Solutions
Even the best-prepared DIY enthusiasts can run into challenges while testing their water. Being aware of common pitfalls will help you achieve valid testing results.
Common Pitfalls
-
Improper Sample Collection: Using incorrect or dirty containers can lead to inaccurate results.
-
Contamination Risks: Even the slightest contamination can skew your results. Be cautious not to touch the inside of bottles or caps.
-
Reading Errors: Misinterpreting color changes or failing to follow instructions correctly can result in faulty readings.
Strategies to Avoid These Pitfalls
-
Always follow sample collection instructions diligently.
-
Keep a clean and organized testing area to minimize contamination risks.
-
Regularly check the expiration dates of test kits and ensure they are stored properly.
By recognizing common mistakes and implementing strategies to counteract them, you can enhance your confidence and accuracy in DIY water testing.
Illustration of common mistakes in DIY water testing (Source: Consumer Notice)
Safety First: Handling Chemicals Responsibly
When working with chemical reagents, adhering to safety protocols is paramount. Understanding these guidelines will protect both you and your environment.
Safety Gear and Precautions
-
Always wear appropriate personal protective equipment (PPE), including gloves and goggles, to safeguard against chemical exposure.
-
Be familiar with the Safety Data Sheets (SDS) for any chemicals you’ll be using. These documents explain safe handling practices and potential hazards.
Disposal Techniques
-
To prevent environmental contamination, do not pour chemicals down the drain. Instead, follow local regulations for proper chemical disposal.
-
Ensure that all testing materials are disposed of correctly, and check if suppliers have take-back programs for hazardous waste.
By prioritizing safety, you enhance your DIY testing practices to be effective and responsible.

Proper PPE for handling chemicals in water testing (Source: Medrux)
Conclusion: Empowering Your Pond Through DIY Water Testing
In conclusion, you now have the tools and knowledge to monitor your pond’s water quality through DIY methods that provide lab-grade accuracy. Regular testing not only improves the health of your aquatic environment but also empowers you as a pond owner.
As you embark on your DIY water testing journey, consider maintaining a record of your findings and sharing these with fellow pond enthusiasts. Connecting with a community can provide support and additional resources to advance your testing practices.
Ultimately, effective water management in your pond begins with consistent and accurate testing. The insights you gain from regular monitoring will lead to a thriving ecosystem that you can enjoy for many years.

Success of effective water quality management (Source: Nualgi Ponds)